
How to Repair Car Leather Seats
If you’re wondering how to repair your car’s leather seats, I’ve got you covered. Over time, leather seats can start showing signs of wear and tear – from cracks and scratches to fading color. But don’t worry, with a few simple steps, you’ll be able to restore them back to their former glory.
Firstly, assess the extent of the damage. Take a close look at the affected areas and determine whether they can be repaired or if they require professional intervention. Minor scuffs and scratches can often be fixed with a leather repair kit that includes a filler compound and color-matching dye.
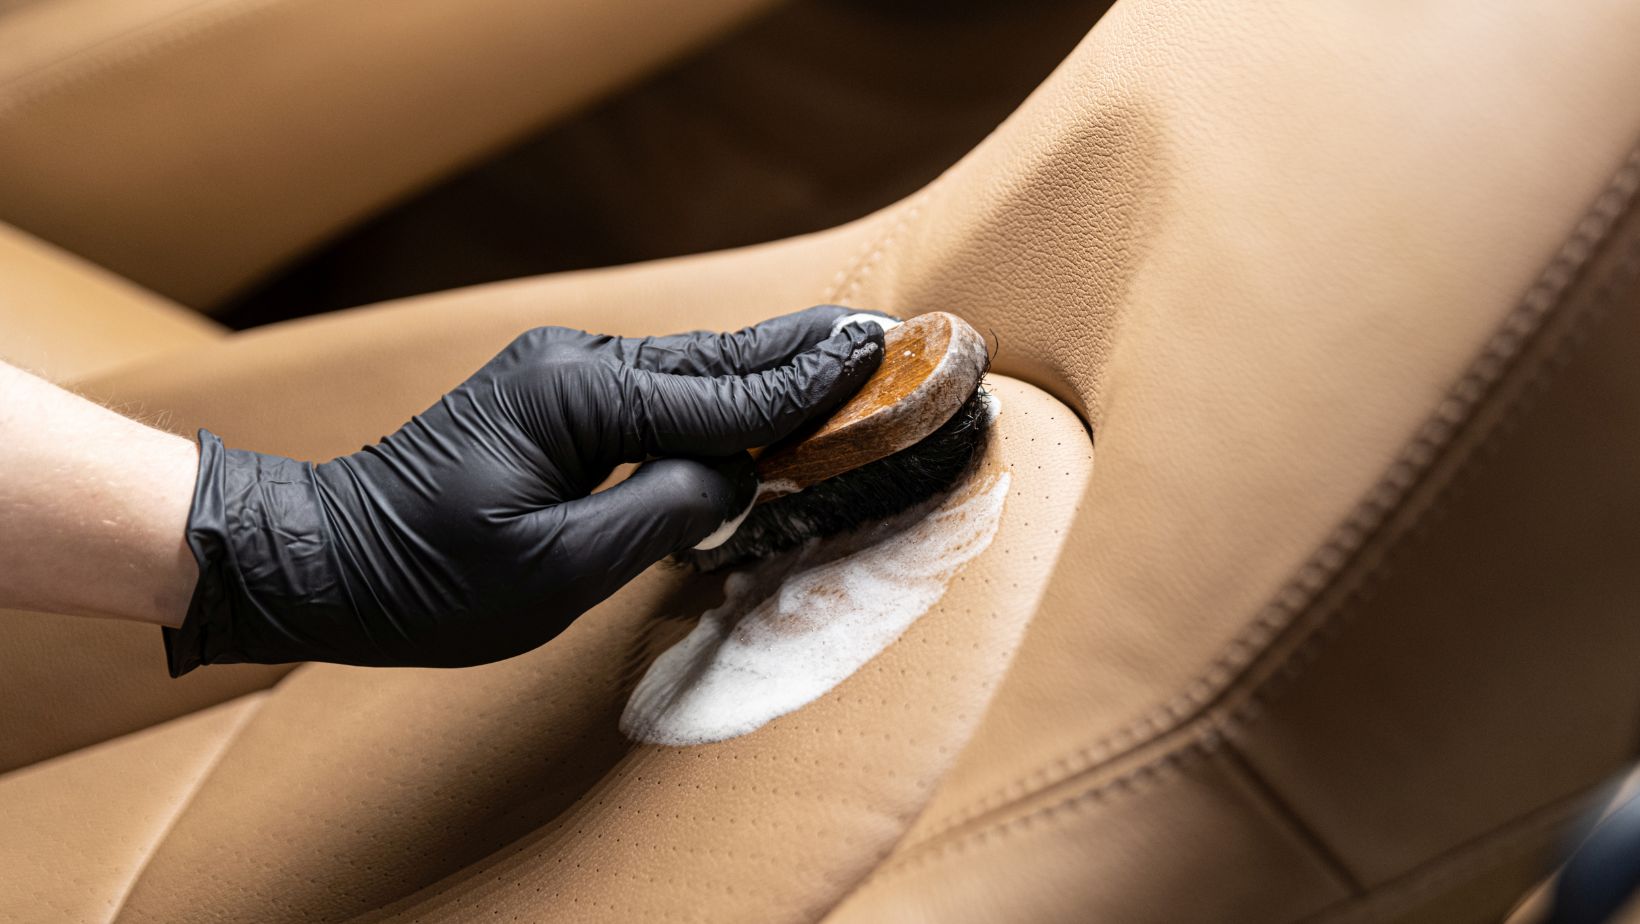
Next, clean the seats thoroughly using a mild leather cleaner and a soft brush or cloth. This will remove any dirt or grime that could interfere with the repair process. Once clean, apply the filler compound carefully into the damaged areas, following the instructions provided with your repair kit.
Repairing Small Tears or Scratches
When it comes to maintaining the pristine condition of your car’s leather seats, addressing small tears or scratches promptly is key. These imperfections can not only be unsightly but also lead to further damage if left untreated. Fortunately, repairing these minor issues doesn’t have to be a daunting task. With a few simple steps and some basic supplies, you can restore your car’s leather seats to their former glory.
Here are some effective techniques for repairing small tears or scratches on car leather seats:
- Assess the Damage: Begin by carefully examining the tear or scratch to determine its size and severity. If it’s a minor scratch, you may be able to fix it with minimal effort. However, for larger tears, you might need to consider professional assistance.
- Clean the Area: Before starting any repair work, clean the affected area thoroughly using a mild soap solution and a soft cloth. This will remove dirt and grime that could interfere with the repair process.
- Apply Leather Filler: For small tears or deep scratches, using a high-quality leather filler can help restore the damaged area. Follow the instructions provided with the filler product and apply it evenly over the affected area using a spatula or palette knife.
- Smooth Out and Blend: Once you’ve applied the filler, use sandpaper with a fine grit (around 320-400) to smooth out any rough edges until they’re level with the surrounding leather surface. Take care not to oversand as this can cause additional damage.
Remember, while these techniques can work well for small tears or scratches, more extensive damage may require professional help. If you’re unsure about tackling larger repairs yourself, consulting an expert in car leather seat restoration is always a wise choice.
Matching and Applying Dye
Now that we’ve addressed the cleaning and preparation steps for repairing car leather seats, let’s move on to the next crucial stage: matching and applying dye. This step is essential to ensure a seamless repair that blends in with the original color of your leather seats.
- Find the Right Match:
Before you begin applying any dye, it’s important to find a dye that closely matches the color of your car’s leather seats. Many automotive supply stores offer leather dyes specifically formulated for this purpose. Look for a dye that is compatible with your type of leather and matches its shade as closely as possible.
- Test on an Inconspicuous Area:
To ensure a perfect match, always perform a patch test on an inconspicuous area of your leather seat before proceeding with full-scale application. This will help you assess whether the dye color is accurate and if any adjustments need to be made.
- Prepare the Leather Surface:
Before applying the dye, clean the damaged area using a mild soap or leather cleaner. Gently scrub away any dirt or debris using a soft cloth or brush. Allow the surface to dry completely before moving forward with the dye application process.
- Apply Dye Evenly:
Using an applicator sponge or brush, apply the dye evenly onto the damaged area of your car’s leather seat in smooth, thin layers. Start from one edge and work your way towards the center, ensuring complete coverage while avoiding excessive buildup.
- Blend in Layers:
For better results, apply multiple thin layers of dye rather than one thick layer. Allow each layer to dry before applying another coat, gradually building up until you achieve a uniform color match with surrounding areas.
- Feathering Technique:
If there is still some visible contrast between repaired and original areas after applying multiple layers of dye, try using a feathering technique to blend them seamlessly together. Gently feather out the edges of the repaired area by lightly applying dye to surrounding untouched areas. This will help create a gradual transition and minimize any noticeable boundaries.
Remember, patience is key when repairing car leather seats. Take your time to ensure each step is done thoroughly and accurately for the best possible results. With proper matching and application of dye, you can restore your car’s leather seats to their former glory.


