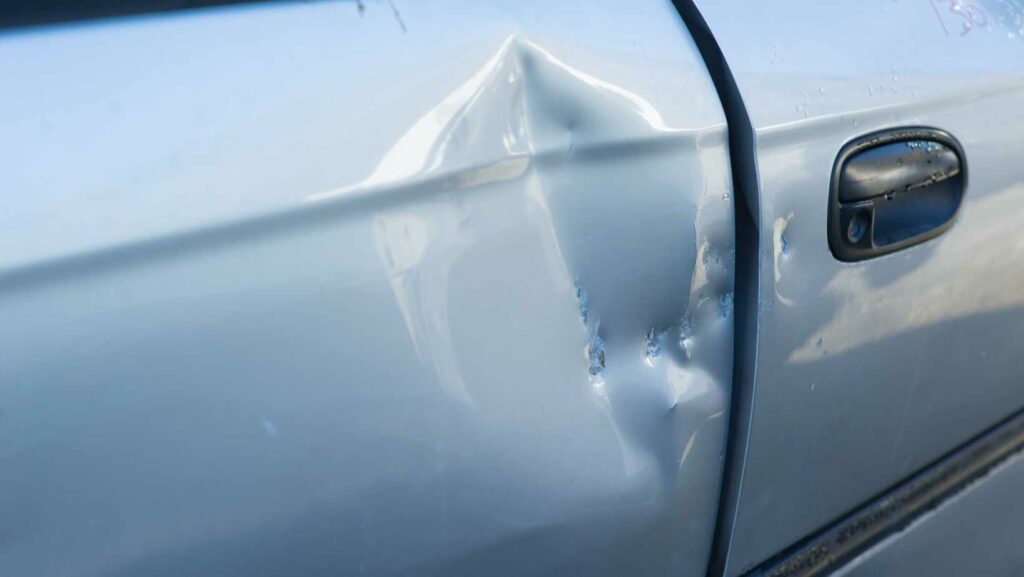
Picture this: you’re about to head out for a night on the town, and you spot a nasty dent on your car door. It’s frustrating, right? Well, with the car ding repair kit, you can say goodbye to those unsightly blemishes in no time. I’ll be diving into the features, benefits, and step-by-step instructions on how to use this handy kit to restore your car’s exterior to its former glory.
Car Ding Repair Kit
When it comes to taking care of unsightly dents and dings on your car, finding a solution that is quick, affordable, and convenient can be a real game-changer. That’s where a car ding repair kit comes in. With its advanced features and innovative design, this kit is a must-have for any car owner looking to restore their vehicle’s exterior to its former glory. Let’s take a closer look at the key features that make this kit stand out:
1. Dent Pulling Tabs: The car ding repair kit is equipped with a variety of dent pulling tabs, each designed to tackle different sizes and types of dents. From small dings to deep creases, these tabs provide a strong and secure grip, allowing you to effectively pull out the dent with precision and ease.
2. Glue Gun and Glue Sticks: The kit includes a high-quality glue gun and glue sticks, which are essential for the dent repair process. The glue gun heats up quickly and ensures a strong bond between the dent pulling tab and the car’s surface. The glue sticks are specially formulated to provide excellent adhesion and flexibility, allowing for seamless repairs.
3. Dent Lifter: One of the standout features of this car ding repair kit is the dent lifter. This versatile tool is designed to exert controlled pressure on the dent, gradually lifting it back into place. With its ergonomic handle and adjustable height, the dent lifter makes the repair process comfortable and efficient.
4. Tapping Pen and Knockdown: The kit also includes a tapping pen and a knockdown tool. These tools are used to further refine the dent repair by gently tapping and shaping the surface. The tapping pen allows for precise adjustments, while the knockdown tool gently pushes down any high spots, creating a smooth and even finish.
5. Easy-to-Follow Instructions: To ensure success, the car ding repair kit comes with detailed, step-by-step instructions. These clear and concise instructions guide you through the entire repair process, helping you achieve professional-looking results. Even if you’re a beginner, you can confidently use this kit to restore your car’s exterior.
With its impressive features and easy-to-use tools, the car ding repair kit is a great investment for car owners who want to restore their vehicle’s appearance without the hassle of visiting an auto body shop.

Step-by-Step Instructions for Using the Car Ding Repair Kit
Using a car ding repair kit is a simple and straightforward process. By following these step-by-step instructions, you can effectively fix dents in your car and restore its appearance. Here’s how to do it:
Step 1: Prepare The Area
- Start by cleaning the dented area and removing any dirt or debris. This will ensure a clean surface to work on.
- Use a mild soap and water solution or a car wash product to clean the area thoroughly.
- Dry the surface with a clean, lint-free towel before proceeding to the next step.
Step 2: Assess The Damage
- Carefully examine the dent to determine the severity of the damage.
- Check if the paint is scratched or cracked, as this may require additional repair steps.
- Assess if the dent is accessible from the inside or outside of the panel.
Step 3: Apply The Adhesive
- Apply a generous amount of adhesive to the suction cup provided in the kit.
- Place the suction cup firmly over the center of the dent, ensuring a tight seal.
- Allow the adhesive to set for a few minutes, ensuring a strong bond with the dent.
Step 4: Use The Pulling Bridge
- Attach the pulling bridge to the suction cup, ensuring a secure connection.
- Gently pull the dent using the pulling bridge, applying steady pressure.
- Gradually increase the force until the dent pops back into place.
Step 5: Remove The Adhesive
- Once the dent is repaired and the surface is smooth, remove the adhesive residue.
- Use a clean, soft cloth or a mild adhesive remover to wipe away any remaining adhesive.
Step 6: Polish And Protect
- After removing the adhesive, polish the area with a car polish or wax to restore the shine.
- Apply a layer of automotive paint sealant to protect the repaired area from future damage.
By following these step-by-step instructions, you can successfully use a car ding repair kit to fix dents in your vehicle. The convenience, cost-effectiveness, and ease of use of these kits make them a valuable tool for any car owner.

